Nature is an amazing gardener if you think about it. Everything about how nature cares for plants is an amazingly perfectly designed system, and even though we try, we just can’t fully imitate perfection. Worms, for example, are perfect for making natural fertilizer for plants, including indoor plants.
Should you put worms in indoor plants? The simplest answer is no. Can and should are two very different words, and while you can put worms in potted plants, the potted environment is not ideal for the worms. They could either start eating the plant’s roots or just outright die, which would leave a disgusting smell in a home.
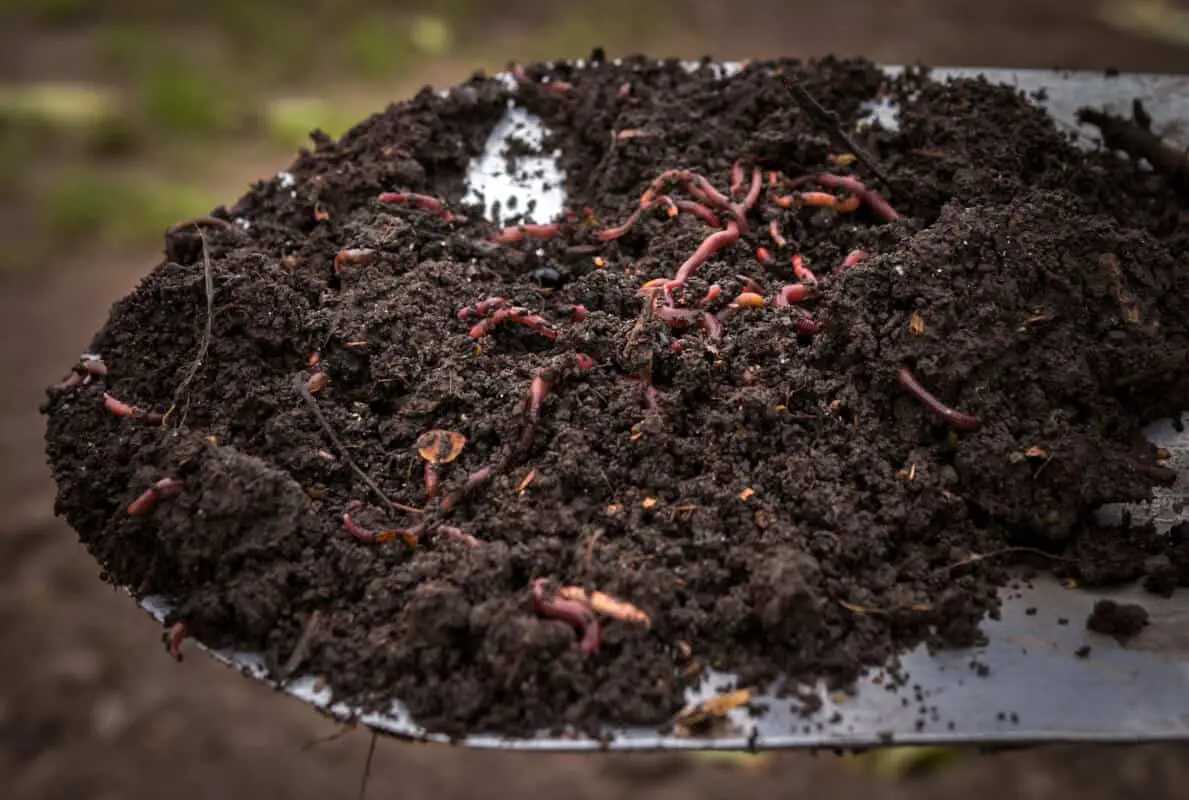
The fertilizer from worms, called worm castings (which also means worm feces), is perfect for any plant, potted or otherwise. The risk, however, to the plant can be serious. There is a good alternative that can provide that needed fertilizer that can be done inside your home. There is also the aeration that worms could provide your plant, which can also be addressed otherwise.
Aeration
Let’s take a look at aeration first as this would be one of the first benefits that worms in potted plants would provide. As the worms burrow around, they would create tunnels which provide your plant’s roots with oxygen. This is important for the plant and will allow for the roots to be able to grow more which results in a larger, fuller plant, assuming other conditions are correct.
As you water your plants, the water will compact the soil. Unless you are misting your plants when you water them, you will be compacting the soil which can suffocate your plant's roots. By checking the roots on a regular basis, you can help to aerate the soil; however, when you move them to new pots, you can accomplish this goal as well.
We could help with aeration to the plant’s roots by repotting the plant into a larger pot. This would give more room for the roots to stretch out and grow. This, in turn, would allow the roots to get more nutrients and help the rest of the plant grow better. Plants that get too big for their pots could potentially even crack the pot in its attempt to gain more room.
Fertilizer
Worm castings are nature’s solution to making sure plants have the perfect fertilizer and food for optimal growth. There is, however, another way to be able to provide this to your plants without actually having worms in the pots with them. This is a method called vermiculture or vermicomposting. In simplified terms, you raise your own worms.
Though this is basically raising your own worms, though there is a bit more to it than that. There are a number of benefits to vermiculture, just a few are listed below:
- Cheap start up
- Cheap upkeep
- Organic
- Best fertilizer that money can buy
The start up is actually probably cheaper than you think — a few small plastic storage boxes, some bedding and, of course, your worms. You can get good wigglers from just about any fishing supply store, and you get to save some wormy lives in the process. Your worms will eat, poop, and breed increasing the amount of castings you get in time.
The upkeep on the worms is pretty cheap too. Any vegetable matter that you would normally throw away can go to the worms. From apple cores to watermelon rinds and even lettuce that is turning brown can be given to the worms to eat. As long as you cut it up and mix it in with their bedding, they are happy to eat it for you.
It is the most organic fertilizer that you can get. By knowing what you are feeding the worms, you know that your plants won’t be exposed to dangerous chemicals in the process. It is also a good way to limit the amount of food you throw in the trash each week as well.
There is no fertilizer like that which nature provides. All you are doing is giving that to your plants without risking your plant's roots. Worm castings have everything that a plant needs as far as food, and it is pennies per pound when you consider the worms are just eating your trash. Just another way of recycling that can help save our environment.
Making Cast Tea
One of the best ways I have found to feed the castings to my plants is to make a tea from it. Now it all depends on if you use a multiple bin set up (instructions below) or a large flat set up.
If you use a large flat set up, you can feed your worms by mixing in some food on one half of their bin, the next day you can take some dirt and castings from the other side. I mix a cup or two of the dirt in with a couple of pints of rainwater that I have collected and let it sit for about a week. This helps to break down the castings, and the resulting tea is full of nutrients.
I make sure that I don’t have any worms in the dirt I use, which is why I take the dirt from the opposite side that I fed the worms the day before. They will all migrate to the side that has the food, and that will leave me with empty dirt to use. By letting it set for a week in the rainwater, I can just water my plants with the rainwater turned tea for a healthy drink with fertilizer.
Making Your Own Vermiculture Bin
My first worm bin made for easy care and collection of casting tea. The one I made took me about 20 minutes and was simple, requiring just a few tools. You can make your own too by following these simple steps:
- Get 4 or 5 plastic storage boxes that are the same size
- Drill some holes in all the bottoms except one.
- The one without holes is your bottom bin and will get more concentrated tea in it over time.
- To make removing the tea easier, you can add a drain with plug or a tap.
- Carefully stack your bins on top of each other.
- The bottom bin should rest on some bricks or something to ensure proper air flow all the way around it.
- In the top bin, you will put your worms (red wigglers are best) along with some bedding (I use coconut fiber, but shredded newspaper will work well too)
- On top of the bedding, you will want to put a food source. Any vegetation will work, stay away from things like meat.
- Cover the food with more bedding.
- As you have more vegetation trash, just feed it to your worms.
- As the bin fills with worm castings, move the bin down and bring the one just above the bottom one to the top. As long as the holes in the uppermost bin set on the bedding in the lower bin, the worms will move towards the food.
- Make sure to keep your worms and bedding moist. If you use a food that is high in moisture like melon, then this step may not be required. Rainwater is best, so your worms don’t get damaged or killed with chemicals from tap water.
- As the water filters through, it will begin to settle in the bottom bin along with some of the castings, as you transition through the bins. This type of tea can be used directly to water your plants without having to sit first.
- Just open your tap or drain hole in the bottom bin to drain off some tea for your plants to enjoy. It may take a few months for you to start getting tea in the bottom bin as the worms are working to break down the food and the water filters through all of the layers.