A lot of gardeners like to use seeding bought at a local nursery instead of starting their own seeds because the process can be daunting, but it doesn't have to be! Starting seeds is really fun and much more cost-effective. One of the things gardeners are concerned about is the soaking process.
So, is it necessary to soak seeds before planting? Soaking seeds is not necessary for growing most plants, but soaking will make the seed germinate faster. It is best not to soak small seeds that do not have a hard outer shell as they do not benefit from it, which makes the seeds challenging to work with. If using a hydroponic growing method, soaking is not usually necessary.
For the ins and outs of seeds soaking, including when to do it, how to do it, and how it can help you grow seedlings faster, stick with us! We've got all the answers to all your questions.
Why Does Soaking Seeds Speed Up Germination?
To understand why seeds germinate faster after soaking, you have to understand what a seed is. The outside of the seed is just a protective layer that keeps the plant embryo inside safe until the right conditions are met.
Seeds will germinate faster after being soaked three reasons:
- Soaking helps break down the protective outer coating. Seeds have to go through some serious hazards before it is able to grow, including being eaten! The seeds you get in a packet of seeds have had a much cushier life than seeds trying to make it out in the wild, so giving them a little tough love in the form of soaking will break down protections and allow the seed to germinate.
- Soaking helps break down growth inhibitors. Seeds have growth inhibitors, which are a substance in the seeds that keeps it from growing until the conditions are ripe. For example, a peach pit has growth inhibitors that prevent the pit from growing inside the peach.
- Seeds don't germinate without water. Once the growth inhibitors have broken down, the seed still needs certain conditions before it decides to grow. One of these conditions is moisture. Soaking the seeds tells the seed that they are in an environment where they will have enough water to grow.
So, soaking your seeds before planting can speed things up, but you won't see the same benefits from all seeds.
Which Seeds Benefit the Most from Soaking?
Some seeds don't have the same level of protection as others. For example, a tiny little lettuce seed doesn't have the same thick outer later that a pumpkin seed has. Soaking beforehand might speed up the process a little bit, but most gardeners don't see it as worth the hassle because the minuscule wet seeds are challenging to work with.
Large seeds that or wrinkled or have hard coats should always be soaked to speed up germination. Otherwise, you might be waiting a long time for those first sprouts to appear.
Examples of seeds that need soaking:
- Pumpkins and squash
- Corn
- Beans
- Peas
- Sunflower
- Chard
- Cucumber
Which Seeds Shouldn't be Soaked?
You usually won't run into trouble when soaking smaller seeds that don't have hard outer coatings, but they shouldn't be soaked as long, and you likely won't see a huge difference in germination rate.
Examples of seeds you can skip soaking:
- Tomatoes
- Lettuce
- Carrots
- Radish
- Leafy greens like spinach
- Celery
Some of this is common sense. If you look at a seed and think it will quickly become waterlogged, then you probably don't need to soak it.
Do You Need to Soak Seeds for Hydroponics?
If you're growing hydroponically, there is typically no need to soak seeds before starting them. Because of the moisture levels already present in hydroponic gardening, it is unnecessary to start them out in water.
Essentially, starting seeds hydroponically has seed soaking built into the process already.
How to Soak Seeds Before Planting
Seeds soaking is about as simple as it comes, but it can be a little intimidating if you're new to seed starting, so we've put together this set by step guide to soaking seeds.
- Fill a bowl or other container with warm water. You don't need to fill it all the way. You just need enough water to cover the seeds, but having extra won't hurt. Do not use boiling hot water.
- Place the seeds in the water and let them sit for 4-24 hours, depending on the seed's size and hardness. We'll talk about this more later.
- Once your seeds are ready, you should take the seeds out of the water. We recommend placing a paper towel in a strainer and then dumping the water through it, but any method of separating the seed from the water is perfectly fine.
- Sort out any seeds that seem like they are not going to germinate, like any deformed or off-color seeds.
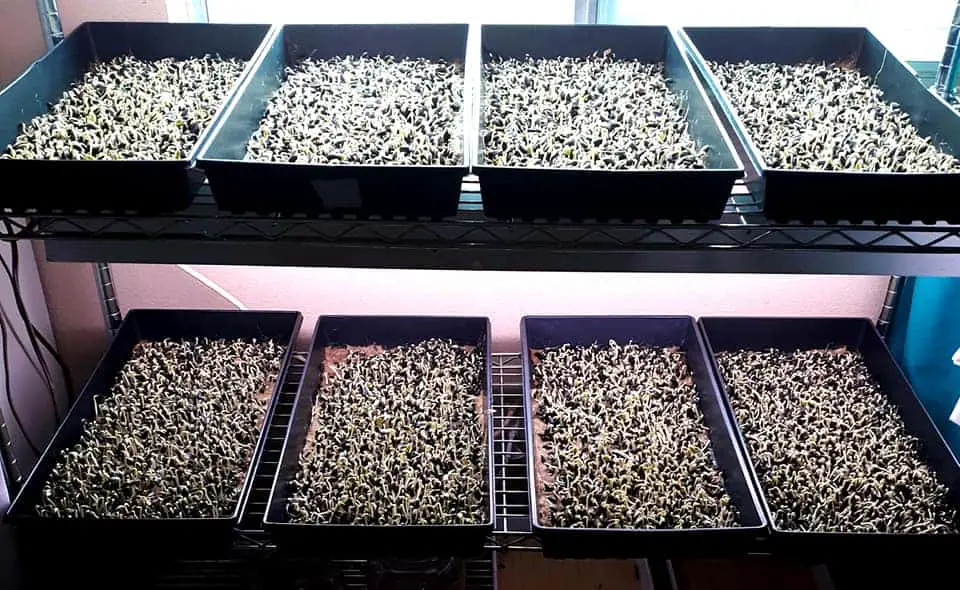
- The rest are ready to be planted in your garden!
Easy right? But if this method doesn't appeal to you, you can also place the seeds in saturated paper towels and then seal them in a plastic bag. With this method, you won't have to worry about pouring water out of the bowl or your bowl getting knocked over while the seeds are soaking.
How Long Should You Soak Seeds?
It is possible to over soak your seeds, so you don't want to let them go too long or forget about them. There will be signs that your seeds are done soaking, but once you've done it a couple of times, you'll get used to the timing.
Here are the signs that it is time to take your seeds out of the water:
- They become slightly lighter in color.
- They become plump.
- They become softer.
Not all seeds will react exactly the same way, so listen to your green thumb. If you think it is time to take the seeds out of the water, go ahead and do it. Generally speaking, it is better to under soak the seeds than oversoak them as oversoaking will cause the seed to die.
Here are some general guidelines about how long the seeds should soak for:
- Small seeds without a thick protective coat: 4-6 hours
- Large seeds with this protective coat: 8-12 hours and sometimes as much as 24 hours
- Medium seeds: 6-12 hours
Use these numbers as guidelines only and keep on eye on your soaking seeds to be sure you don't over soak them.
What Kind of Water Should You Use to Soak Seeds?
Whatever water you use to water your plants can be used for soaking your seeds. It is best to avoid chlorinated water. You can dechlorinate water yourself by leaving it to sit out in a bowl for 24 hours, or you can use clean rainwater or purified water.
Some gardens like to use coffee, tea, or water that has been treated with an acidic substance to soak their seeds. We don't recommend it. Regular old water is just fine unless you're working with an exotic seed that has special requirements.
Should Seeds Float When Soaking?
Your seeds might float at first when you soak them, but you don't need to push them down. After 15 minutes or so, they should no longer be floating.
If any of your seeds are still floating after waiting 15 minutes, it is possible that these seeds will not germinate. The floating can indicate a problem with the embryo in the seed or air pockets inside the seed that could be detrimental to growth.
There is still some hope that the floaters could germinate; it is simply less likely. So if you have an abundance of seeds, you can discard these and plant only the ones that are most likely to grow.
Seed Soaking Isn't Absolutely Necessary
Remember, seed soaking isn't necessary for most seeds, but if you're trying to speed up the germination process, then it is one of the simplest things you can do. It won't cost you anything, and for those seeds with thick outer layers, it can shave a substantial amount of time off of germination. It's not necessary, but it is certainly worth it!