Lush green ferns can really make a house or apartment feel closer to the outdoors and Mother Earth, and they are a great way to bring life into an otherwise inanimate room. In this article, we will provide you with all the information you need to become a fern expert and watch them grow tall and luxurious in your home.
How to grow indoor ferns – the compete step-by-step guide. Always plant your fern in a plastic pot to grow, instead of clay pot. Make sure to fill fern pots with the correct soil. Make sure you have the right lighting. Ensure your fern is getting the water it needs, and even increase the humidity around the plant. Make sure to fertilize a little during the growing season of April through September.
Ferns are different from most other houseplants and we’ll explain how. Also, we pulled research from plant experts to help guide you on what kind of care and maintenance ferns need, and many tips on how and why you need to take extra care to keep them healthy and growing.
How Are Ferns Different from other plants?
Ferns are green plants that are flowerless, which is different from other plants. They have divided leaves and they tend to grow in damp, shady areas, although they optimum living conditions can be provided in a home as well. The leaves of most ferns uncoil from a koru, which is a spiral coil then unfolds when leaves are formed.
Ferns are from a very old, even ancient, group of plants. Research from fossil records show that scientists have concluded that land plants evolved from the water approximately 475 million years ago. 75 million years later, vascular plants had broken away from non-vascular plants, and further branching off led to the development of ferns.
Roughly 120 million years later, many of the major fern families were first seen in fossil records. This confirms that ferns are indeed older than most of our land animals – some these animals were on land around this time – and these are far older than our dinosaurs!
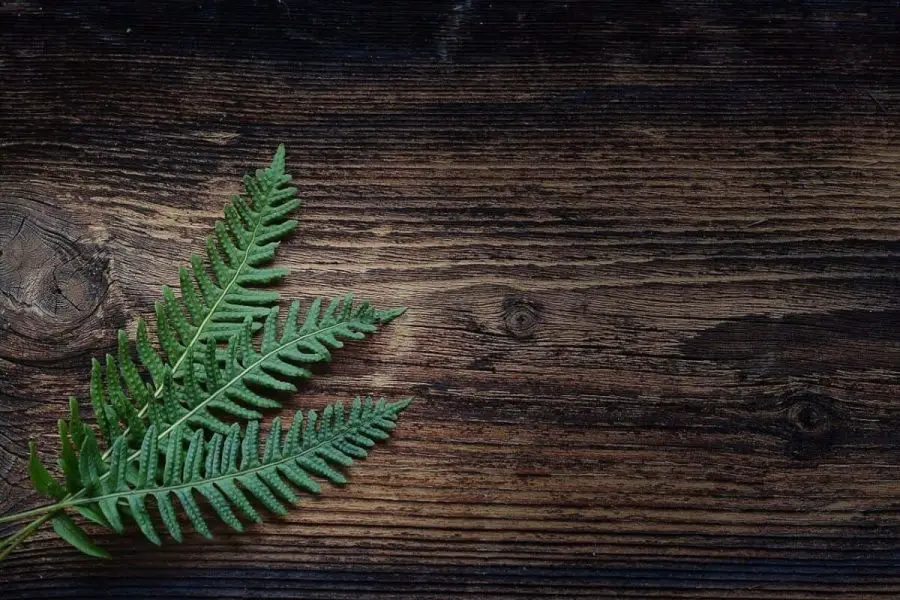
The ferns we are familiar with come in a variety of shapes and sizes – from very small ones like the “kidney fern,” to the 65-foot tall “tree fern.” Also, it should be noted that most ferns have the same basic structure.
The structure of a fern
Ferns have 3 primary sections – the rhizome, the fronds and the sporangia, which are the reproductive structures. The different characteristics of each of these 3 parts of the fern plant are what is used for to classify and identify them.
- A rhizome is the stem of the fern plant. It comes in 3 basic forms:
- An erect rhizome, is a solid mass that gives rise to a tuft of fronds. This type of rhizome is commonly found on a king fern or a crown fern.
- A laterally growing rhizome creeps along the ground or under the ground. It is capable of even climbing up a tree. The Hound’s Tongue Fern and the Thread Fern are both samples of ferns with creeping rhizomes.
- A vertical rhizome can grow into a short or a tall trunk. The trunk of a Silver Fern is actually an example of a vertical rhizome.
Fronds are the leaves of a fern. There is usually a stalk, called the stipe, with a flat blade, called the lamina, and is often divided into segments. A frond may be simple and one piece, or it may be split into many divisions, called “pinnae.” When new fronds are needed, they are produced from the rhizome.
They are tightly coiled into a spiral called a koru, and these slowly uncoil as they mature. Fronds have a dual function. Their primary function is photosynthesis – synthesizing food from sunlight, carbon dioxide and water into oxygen – but fronds also are used for reproduction.
The spores grow inside the casings called sporangia, and both of these are located on the underside of fronds, although not every frond has sporangia on the underside. Fronds that do contain sporangia are called “fertile fronds.” In most ferns, the sporangia are found in clusters, called sori.
These sori are the brown, black or orange-colored patches that can be seen on the bottom of fronds. Then, when the sporangia break open, they release the spores into the atmosphere.
There are a group of leafy fern plants the we can be found outdoors in the nature that produce spores as well, and these are called sporophytes. In the case of this type of fern, the spores are released by the sporangia, if they land in a hospitable area, they will grow into a tiny plant called the gametophyte.
This unnoticeable, short-lived plant has two reproductive systems – the antheridia which is male, and the archegonia which is female. In moist conditions that are most suitable, fertilization can take place either on the same gametophyte or an adjacent one, and this fertilization produces a new sporophyte.
There is no other land plant that has these two separate and independent living stages, and this is a distinct trait of ferns.
What are Fern’s Special Needs?
As we can see from the previous description, ferns are very unique in the plant world. They are constructed differently from other plants, they reproduce differently from other plants, and we can assume that they have different requirements for care and maintenance.
Due to their unique chemical and anatomical makeup, ferns have specific requirements for soil, fertilizers, and watering. We will examine recommendations from experts regarding these 3 elements.
Keep in mind that indoor ferns have different needs than outdoor ferns, and this should also be taken into consideration when planning your care and maintenance schedules.
Always take into account how ferns live in the wild. They are very green leafy plants that live in very humid and lush environments among other similar plants and forest moss. They will be most healthy duplicating this environment indoors, if possible. If grown outdoors, it is also important to try to copy their home setting as much as possible.
Soil
With their beautiful leaves and luxurious growth patterns even in shady places, ferns are outstanding plants to add to your house, either indoors and outdoors, and the majority of ferns prefer warm and moist environments for their best growth and health.
Ferns like loose organic soil. To make sure your soil is organically rich in humus, you can work in a compost, some pine bark or a little perlite into the soil before planting your ferns.
If you intend to grow your ferns as houseplants, you will need to remember to repot them when they grow too big for their previous pots. Adding some peat moss to your soil at the time of potting them is very helpful, because it improves the soil's ability to hold water.
The main idea to keep in mind is that ferns need soil that is both wet with good drainage. Although some ferns can survive poor drainage it's not ideal for any of them. Though some unique ferns, such as “maidenhairs,” prefer slightly more alkaline soil, the majority of other ferns prefer acidic soils.
Note: If your soil is too alkaline, you can just add organic mulch to increase the acidity over time. Conversely, if you add some crushed limestone or oyster shells, this will make your soil more acidic.
Fertilizer
Feed your ferns with fertilizer in the summertime, every fourteen to thirty days using a liquid fertilizer, be careful not to mix it full strength, as you can easily hurt the root system. Just a few drops of your liquid fertilizer can also be added to the water you use for spray-misting. Be aware and don’t feed your ferns in the winter when they are resting, but still keep the air around your ferns moist by misting them often.
Read more about growing ferns indoors at: https://www.gardeningknowhow.com/houseplants/ferns-houseplants/growing-ferns-indoors.htm
The majority of ferns are naturally forest and woodland plants with tender, delicate roots adapted to a light soil from the forest floor, which is usually full of leaf mold and decayed vegetable matter. So, to mimic the forest, the right compost to use must be free draining so that the fern’s roots never get soggy.
Use a compost that contains peat or a peat substitute with fiber and plenty of sand. Never let your compost dry out, which may require you to water the fern a little every single day in your warm, dry atmosphere.
Water
Ferns need regular watering, for the soil to stay moist. This is very important if you have a dry summer where the heat quickly evaporates moisture from the soil.
You’ll find that some ferns actually prefer the soil to be a little dry between waterings, all ferns dislike completely dried-out soil. When giving water to your ferns, you should use a slightly warm water to avoid damaging their tropical root systems and be careful not to leave one waterlogged, as this can lead to root rot.
Keep the humidity high in close range of your fern. High air moisture levels are the best for tropical ferns. There are three ways to create high humidity levels: double pot your fern, keep your fern on a tray full of water, or add an electric humidifier in the room.
To double pot your fern, select another pot a bit bigger than the current pot your ferns are planted in. Fill the new pot with wet moss, and then place the second original pot with the fern inside it. Cover the top of the soil and the rim of the original pot with more wet moss and water every few days to keep it moist.
Put your potted fern on a tray or saucer full of small stones or pebbles and fill the tray up to just under the stones' surface with water. The water will evaporate and moisten the fern.
If you use a humidifier, place it in close proximity to your fern.
Remember to mist your fern with a spray bottle filled with lukewarm distilled water on a daily basis. Aim the spray in the air above the fern to let it settle on the leaves.
How to Start Growing Ferns
Popular types of ferns for a garden should always be planted in a partly shaded area and in rich organic soil that is both wet and well-drained. Arranging the ferns should depend on the variety – some are mat-forming meaning they will quickly spread to form a blanket and cover an area, while others are self-contained and separated.
The most important rule for most ferns is to always keep them moist. There are a lot of ferns that are so easy to grow that they can become an annoyance by spreading where you don't want them to. Also, watch for damage from slugs throughout the seasons.
Light
Most ferns prefer a shady location, but not deep dark shade. The splattering of shade provided by tree branches are best. Think about how ferns in the forest and try to imitate that in your yard.
Ferns can stand up to a little direct sunlight, but the more they get, the more watering you need to do.
Only a few fern varieties like the ostrich fern will handle hot and dry regions.
Most ferns prefer a humidity, but they have a good tolerance for heat. There is likely a fern that can adapt to every climate, keeping in mind soil requirements and humidity needs.
Repotting
When growing ferns in your home, choose tropical types. Rather than typical potting soil, these ferns will grow better in a richer medium commercially mixed soil with some compost, peat moss, and sand. Repotting will be necessary when a fern begins to get tight in its container.
Propagation from Spores
You can collect fern spores but wait until they get dark and begin to fall off the fronds, as they are ripe. An easy way to check this is to cut off a frond when its spores are beginning to get dark. Leave the frond on a piece of paper and wait for the spores to fall. Make sure they are fully mature and fall on their own.
Fill another container with moistened potting mix designed for ferns. Shake the spores off the paper directly into the mix and press with your thumb so the spores make good contact with the soil.
Spray mist the potting mix, moistening the spores to keep them in place.
Cover your container with some plastic wrap and place it in a tray with a couple inches of water. Move it to a warm location with indirect sunlight.
Replenish the water until you see signs of growth, somewhere between 6 and 12 weeks, be patient.
As they germinate you will see small heart-shaped shoots, called prothalli. These should be gently moved out of the container and into individual small pots with damp, sterile fern potting mix. Leave the new shoots uncovered andmoist.
Soon the prothalli will begin developing fronds and they can be slowly pulled and planted outside.
Propagation from Stolons
Another way to propagate ferns is by planting the stolons – these long stringy pieces growing from your fern. These are the runners, and you can germinate ferns by layering them directly on the soil.
Secure the stolons in the soil using a staple or a small rock. Keep them moist and, in a few weeks, the they will root and send up new fern growth. Then, cut the stolen from the parent plant. This new baby can now be transplanted to a different location.
Propagating by Division
When fronds get smaller, or if you notice an empty area, it is time to divide them. While some ferns make visible crowns, others grow as mats of root fibers. To divide them, first dig up the whole chunk and cut six-inch squares of thegrowth. Each section should have one growth tip where fronds are sprouting, to start replanting at the same depth as the original and water them completely.
How to Maintain Your Ferns
Indoor Ferns
Most indoor species of ferns are tropical, meaning they like homes, not the real tropics. Make sure that the temperature near your fern is around 70 °F. Ferns can handle temperatures as low as 60, but they won’t hang in there for long in low temperatures.
Think about placing your ferns by a window inside your bathroom, as the temperature and humidity are often perfect for ferns from showers and baths.
Ferns prefer a humid environment, but they also like wet soil as well. Make sure that your fern’s potting mix is always damp, but never soggy. It is better to water a small amount daily, than heavy amounts sporadically. To find out whether or not your fern needs water, check the soil dampness before watering with your finger.
Over time, almost any fern will outgrow the pot in which it was first planted. The time between transplants can vary depending on the health of your plant but will likely need to repot as early as 6 months after starting.
Outdoor Ferns
Ferns already growing in your garden likely won’t need to move unless they’re looking unhealthy.
Ferns will do well outside if under a canopy of a few other larger plants or trees. Plant ferns into a space that gets northern sun but not a direct sunlight. If your ferns are left in an area that has direct sunlight, it is likely that their leaves could burn.
If you live in an arid climate zone, you’ll probably need to water your ferns daily so that your soil is kept moist. Adding a thick layer of pine needles or leaf mulch on the top of your fern soil, about 2–3 inches.
This mulch will help lock in moisture and keep the evaporation low, so that the air near the ferns is even a bit more humid.
Six months after the original planting, you can begin fertilizing the ferns for added growth. Select an organic fertilizer that is a spray-on type and apply it to the new ferns.
Also, you can add a layer of compost and mulch to the soil to make a moist growing environment for the ferns. But,keep in mind that ferns require much less fertilizer than other plants.
Ferns don’t have many predators outdoors, except for slugs and some uncommon diseases. If, however, you notice that your fern has unhealthy fronds, use some shears to cut them back.
This will keep the character of the plant and prevent it from spreading to other plants.
Tips for Healthy Ferns
- Most ferns like indirect light from a north window or, in summertime they like the filtered splatters of light from an eastern window. Do not put your ferns in windows that face either the west or south because they can become much too hot.
- Keep in mind that many ferns originate in the tropics, where the humidity can reach 70 percent or more. Typical homes in the United States are much drier, even more so when the furnace heat is running in the winter. You can tell if your fern is too dry by looking at the tips of its fronds and see if they are about to turn brown or die. You can easily increase the moisture in the air surrounding your ferns by putting your ferns on top of some small stones or pebbles in a tray or saucer filled with a little water. Make sure not to let the plant touch the water, and then its roots won't rot.
- Spray misting your fern is another good option for humidity. Use room temperature water and mist around the plant – not directly on the leaves, which could cause diseases. Depending on the time of year, you could mix in a very small amount of liquid fertilizer with your water as well but check with a local nursery first for the correct amounts.
- You can group ferns with other types of houseplants together, and this can help to raise the humidity, alternatively you can keep your plant in the bathroom or near the window to get the steam from your shower or bath.
- While most ferns prefer to stay evenly moist throughout, don’t water them too much and let them get soggy. Water them until the water drains out the bottom of the container and then dump any excess water out.
- Make sure your fern is in a location where it has good air circulation.
- If scale, slugs, mealybugs, mites or other pests show up, knock them off with a spray of room temperature water in the sink or shower. Another supposed solution is to soak cigarette butts in a spray bottle for bugs, as the nicotine is a strong repellant
Best Varieties of Ferns for Your Home
Boston fern, often called a ladder fern, was prominent with Victorian gardeners as well as today. It’s also considered one of the most effective plants for removing air pollution. Give these ferns lots of morning sun, pot them in hanging baskets or put them up and sit them on shelves for their long, drooping leaves, or fronds, can hang down and they look great. If your home is overly dry, expect the fern to drop their brown leaves and make a mess. To avoid this, make sure to give them plenty of humidity and keep them away from heating ducts and air vents.
Bird’s nest is an easy to-care-for fern. Its strap-like, leathery fronds spring up coiled up from the center of the fern. As they uncoil, they create a bird’s nest shape. While these are slow growing, this type of fern can reach 6-7 feet high in a large grow room or outdoors, but usually stays around 1-2 feet tall when inside a home. This fern can tolerate less humidity than most ferns and will forgive you if you once in a while forget to water.
Button fern is another easy-to-grow beautiful fern. Originating in New Zealand, it adapts well to typical home conditions. It gets its name from the small, round “buttons” or leaflets on its thin stems. This fern needs moderate to high humidity. While it only grows just 12-18 inches tall, this makes it a good choice for gardeners without much room.
Maidenhair fern deserves a spot on this list because of its lace-like, light foliage and thin, black stems, but it needs constant attention with moisture maintenance and can be somewhat tricky to grow indoors. If the fern is allowed to dry out, its fronds tend to wilt and then die off. But, unless you've forgotten to water it for so long that the entire plant is dried out and dies, it will sooner or later grow some new shoots. For the best results, grow these ferns inside real terrariums, which provide the best high humidity environment they crave.
Silver Brake is a low maintenance fern with attractive, silver stripes on its leaves. These ferns grow about 2 feet in circumference and are beautiful in pots or in hanging baskets. They like daytime temperatures from 68-72 F degrees, and they prefer a drop to around 50-55 at night.
Kangaroo paw is originally from western Australia and it grows roughly 2 feet tall, with long, uniquely shaped fronds that spill down the sides of its container. Kangaroo ferns can bloom outdoors in spring and summer, but if you have the right conditions, you get a surprise with blooms almost anytime.