If you have been considering growing microgreens, one important consideration for getting a healthy crop is how many seeds you should plant in a plot. Even though microgreens may seem small, if you pack the seeds too tightly together, the sprouts will have difficulty growing and your harvest won’t be very satisfying. If you scatter the seeds too thin, you won’t get a full crop come harvest time. So how do you determine how many seeds to plant?
How many seeds do you plant for microgreens? Spacing requirements vary between different types of microgreens, but a general rule of thumb is:
- Sow 10-12 seeds per square inch for small seeds
- Sow 6-8 seeds per square inch for large seeds
There are numerous benefits to growing your own microgreens. It can be a fun and productive hobby and a great way to eat healthier at home. With a little bit of knowledge, growing microgreens can be easy and you can enjoy their benefits in a little over a week, depending on the seed type.
Common Mistakes in Microgreen Seed Sowing
Usually, one of the areas that novice microgreens gardeners will make a mistake is in determining how to plant the seeds. If you sow your seeds too thin, you’ll get a scraggly crop that may not be worth the time and effort it took to grow. But, alternatively, if you cramp your microgreens when you plant this can also spoil your harvest.
If you are truly in doubt, most seed packets and seed distributors will list specific requirements for the spacing of microgreens seeds. The space needed varies between microgreens types, so this is the only way to know for sure how to space your seeds. However, as a general rule, most small seeds are able to be planted denser than larger seeds.
Once you’ve figured out how to space your microgreens seeds, you may inevitably have a few more questions about your crop. This is normal! Luckily, we’re here to answer some of the more common questions that pop up when growing microgreens. Read on to learn more.
What Happens If Microgreen Seeds Aren’t Spaced Properly?
If you are just starting to dabble in the world of microgreens, it may seem like seed spacing isn’t very important. But, in fact, the seeding density can make the difference between a healthy, hearty harvest and a lackluster, spoiled crop.
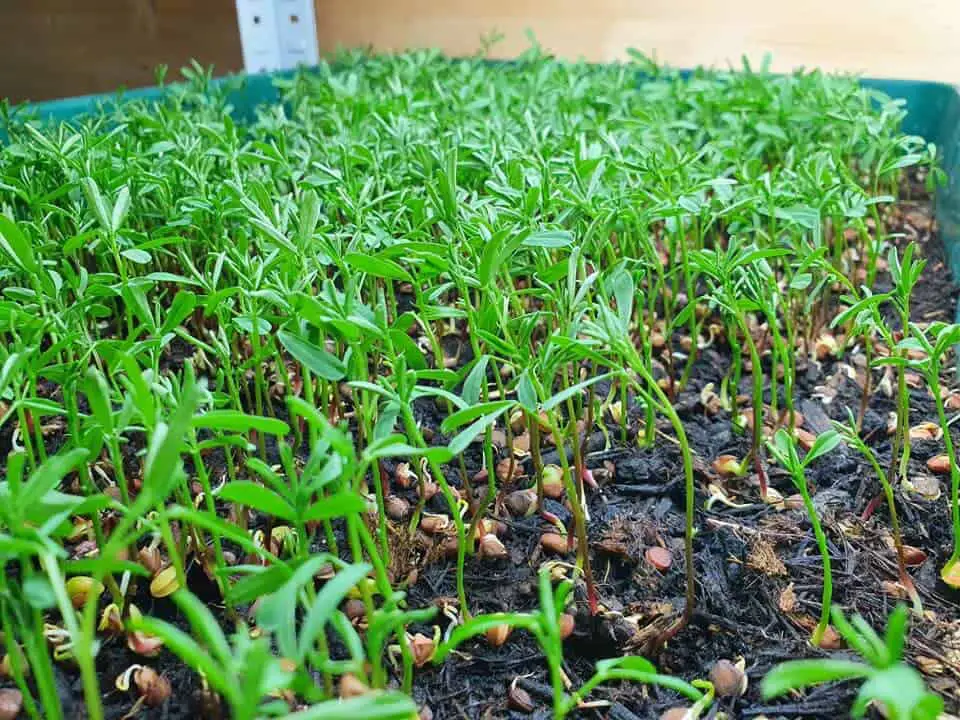
Ideally, the spread of seeds should be dense enough that the entire soil area is covered, but not so thick that airflow through the soil will be impeded. When there isn’t enough air circulation for a microgreens crop, there is an increased risk of the crop becoming diseased. Crowded microgreens are also simply not able to grow as big because they will be competing for resources.
When microgreens aren’t able to grow to their full size, the resulting plant does not contain as many nutrients as the full-grown microgreen. So, while you may feel like planting more seeds will result in a more bountiful crop, you won’t be enjoying the same nutritional value as you would if the plants had been allowed to grow to their full size.
Alternatively, if you space your seeds too much, you will not have very many microgreens growing in your crop. This isn’t necessarily a problem, but it will mean that you are investing more time, soil, and care for less of a product. Over time, this can make the cost of growing your own microgreens fairly expensive. In order to get the most value per tray grown, it is important not to plant too few seeds.
If you have a mix of microgreens you are wishing to plant, you can use a colander or a sieve to help sort out different seed sizes. Different size seeds generally have different space requirements. While some plants may have strict recommendations for spacing, the general idea is that smaller seeds can be planted 10 to 12 per square inch while larger seeds should be planted 6 to 8 per square inch.
What Do I Need to Start Growing Microgreens?
In order to start growing microgreens, you only need a few things. One of the main appeals to growing microgreens is the fact that they don’t require much in order to produce a crop. Once you’ve selected your seeds, you only need a handful of materials to get growing.
Unless you are starting with a prepared microgreens kit, you will need to acquire a growing tray or a shallow pot. Microgreens do not require a lot of growing medium, and the more surface area you have available in a container, the larger your crop yield will be. For this reason, shallow trays or very wide, short pots work best.
For most basic microgreen gardens, the growing container will need to be filled with soil or a non-soil mixture. This serves as the base for the seeds and provides them with the nutrients needed to grow. If you are using a hydroponic system, you will instead require a growing mat or pad to hold the seeds in the water.
In order to grow, your microgreens will require light. Natural sunlight is the cheapest and easiest solution, but if your home doesn’t have a naturally well-lit area you can purchase grow lights. Some microgreen gardening kits come with grow lights so you can grow your microgreens in any lighting situation.
Finally, your microgreens will require water. Many microgreens will grow just fine with regular watering, but some microgreens that prefer to remain damp may be easier to water by using a spray mister. The mister allows you to keep the soil damp but not so soggy that mold and fungus start to grow.
Why Are My Microgreens Getting Mold and Fungus?
Nothing is less appetizing than seeing your crop of nutritious microgreens be overtaken by fuzzy mold and fungus. While sometimes the spoiled crop may simply be the result of bad luck, more often than not there are a few culprits to blame. If you consistently get mold and fungus on your microgreens, you may be making a few common mistakes.
First, you may be planting your seeds too densely. As mentioned above, seed density is an important consideration when growing microgreens. When seeds are placed too closely together, air cannot circulate through the soil properly and water accumulates in the soil. Mold does not like circulating air and loves damp soil, so if your soil is stagnant because the seeds are too dense, it creates an environment favoring mold and fungus.
Mold and fungus also prefer darkness, so if your tray isn’t receiving enough sunlight it can encourage mold to grow. During germination periods, many microgreens are kept in the dark. However, once the germination period is over the tray should be moved to a light source. If sunlight isn’t available, a grow light can work to help grow your microgreens and prevent mold from taking hold.
If you really worry about mold and fungus affecting your crop, it can be helpful to thoroughly clean all your trays and equipment before you start planting. The trays you plant in can be disinfected with a solution of bleach or hydrogen peroxide. Any tools you may use can also be cleaned in this manner. If you have to soak your seeds before planting them, it may be helpful to disinfect them as well.
Certain types of microgreens require relatively moist growing environments, and this inevitably will make mold and fungus growth more common. If you take proper precautions, however, such as carefully attending to seed density when planting, controlling overall humidity and sunlight levels, and disinfecting trays and tools before using, you can still enjoy successful crops free of mold and fungus.
Do I Need to Soak My Microgreens Seeds Before Planting?
Not all microgreen seeds need to be soaked before planting and all microgreens can grow without pre-soaking. Some varieties of microgreens, however, will have an easier time growing is the seeds are soaked so that the hard, protective shell of the seed softens slightly before planting. By taking the time to soak your seeds, you can get a faster, more plentiful crop.
Some of the microgreens crops that benefit from pre-soaking the seeds includes the following varieties:
- Buckwheat
- Sunflower
- Cabbage
- Wheatgrass
- Peas
- Beets
- Chard
- Broccoli
- Radish
- Kale
Some microgreens crops are considered mucilaginous, meaning the seeds become soft, sticky, and gel-like when they come in contact with water. These types of microgreens should not be pre-soaked, because the seeds tend to become oversaturated and will mold. Mucilaginous microgreens include the following varieties:
- Arugula
- Chia
- Basil
- Brown Mustard
- Flax
- Cress
How Do I Pre-Soak My Microgreens Seeds?
If you decide to soak your seeds before planting, the process is relatively simple.
- Measure out the number of seeds you plan to plant in your container
- Rinse the seeds to remove any dust or residue
- Put the seeds into a bowl or shallow container
- Fill the container with cold water so as the cover the seeds in approximately 1” of water
- Cover the bowl, either with a lid, plastic wrap, or a paper towel, and place in a warm area
- Leave the seeds overnight or for about 12 hours, but no longer as this can spoil the seeds
- After the time has elapsed, rinse the seeds again and drain off the excess water, but be sure the seeds remain fairly wet
- Keep the seeds moist for the next 24-36 hours until they start to sprout; you can either keep the seeds in a colander or place them into a new container
- Once the seeds have started to sprout, you can plant them