Growing microgreens has become increasingly green in recent years. Health-conscious consumers want nutritious foods that are not polluted by endocrine-disrupting chemicals leached from plastic growing containers. Luckily, there is a wide range of choices that allow microgreens to be grown without plastics.
Because microgreens need very little soil or no soil at all, they can be grown in almost anything. As long as the stems are accessible for harvest, it doesn’t matter whether they are planted outdoors in a garden or indoors in a pie tin. In this article, we will look at the process of growing microgreens from start to finish.
To grow microgreens without using plastic:
- Choose an environment-friendly container
- Choose your growth medium
- Soak both the medium and the seeds in water for no more than 48 hours
- Spread seeds over growth medium and cover
- Keep seeds covered from light until sprouting begins
- Water seeds at least twice a day
- After sprouting expose plants to sunlight up to 12 hours a day
- Ensure good ventilation across plants to discourage mold
- At 2-4 weeks after sprouting, harvest seeds by snipping with scissors just above the root line
How to grow microgreens without plastic
Carefully plan each step of your process so that your seeds have the optimal chance for success.
Containers Are Important
Since the primary reason for growing microgreens is to provide healthy food without the use of chemicals, your choice of growing container should be chemical-free as well.
The most common growing trays are made from plastic, which is full of harmful chemicals, so it is necessary to find growing containers that are not a threat to our health.
Safe alternatives to the harmful plastic trays include:
- Glass baking dishes
- Paper egg cartons
- Stainless steel trays
- Wooden trays
- Mason jars
These can be items you have on hand, or you can purchase special containers just for growing your microgreens.
Glass Dishes Do A Good Job
There really aren’t any large glass growing trays available; the largest you’ll find is about an eight-inch bowl.
But a nine-by-thirteen Pyrex baking dish will do nicely. You’ll want to be careful about how much water you add to the seedlings since there are no drainage holes. But otherwise, there shouldn’t be any problems.
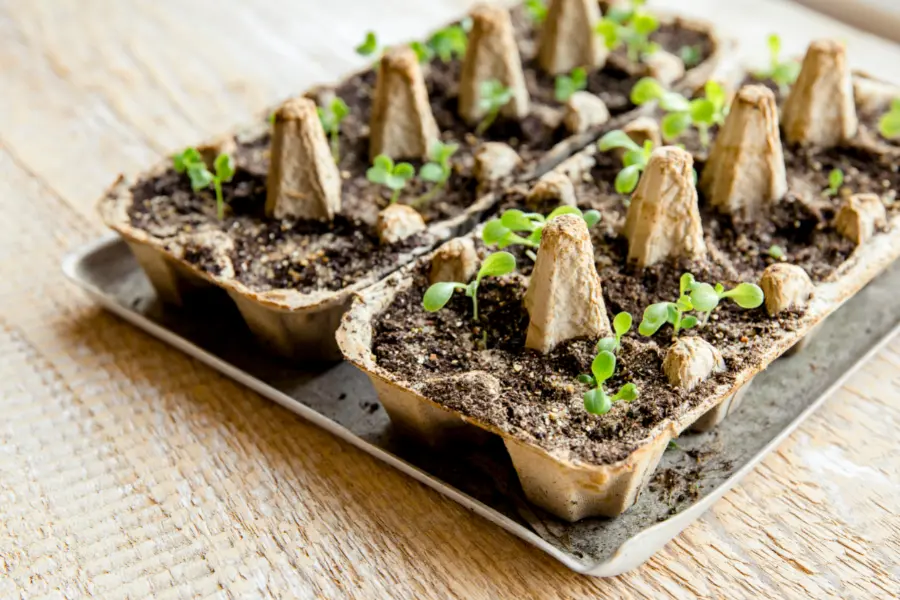
Paper Egg Cartons Are Ideal for Growing Microgreens
You must be sure these are paper. The plastic egg cartons are just as full of leaching chemicals as the plastic growing trays.
But the paper cartons are the perfect size for growing microgreens, not to mention an environment-friendly container. If you don’t have egg cartons, you can buy peat pots, which are a larger version made for starting seeds.
Stainless Steel Trays Work Well
Food grade stainless steel trays are available in several variations. Some are round and stackable; others are a deep-dish style.
But again, any stainless-steel container you may have on hand will work just as well.
Of course, you’ll want to be careful about watering since most likely there won’t be drainage holes built-in.
Wooden Trays Are Well-Designed
These can be bought ready-made, or you can build them yourself with a few one-by-two-inch boards. In either case, if you use soil or compost, you’ll likely need to line the trays with landscape fabric to avoid losing soil through the cracks.
The upside of wooden trays is that you have built-in drainage, so overwatering is not a threat. On the downside, you’ll need to inspect your trays regularly for signs of wood rot.
If you choose to build your own trays, you should use untreated lumber. The chemicals in treated lumber are just as harmful as the chemicals in plastic.
A well-built wooden tray should last you for several years since most of the water will drain away. If the tray is kept in a well-ventilated place, the air will help the timber dry out, making it last longer.
Mason Canning Jars Do Well for Small Crops
You can spend a tidy little sum buying these sprouters, or you can scrounge up wide mouth mason jars from by-gone canning days.
If you want cute and sophisticated, you can buy the jars and holders. If you want functional, you can purchase wide mouth jars by the half dozen at most grocery stores.
For your seeds to get air, you can cap the jar with either a sprouting lid or a piece of screen wire under the jar ring.
The sprouting lid is made of plastic, but the wire mesh is made of stainless steel. It screws on just like a regular jar ring. Again, watering must be done very carefully to avoid root rot since the moisture won’t be able to drain away in the glass jar.
Once you have your container(s) ready, it’s time to choose your growth medium.
Choose Your Growth Medium
Microgreens are quite flexible in that they can grow with or without soil. Of course, some seeds do better in certain mediums than others do, but nearly all seeds can be grown:
- In soil
- In mats
- In compost
- Hydroponically
What medium your plants use is totally up to your preference. But your choice should take into account things like:
- Space
- Time
- Set-up expense
- Your level of experience
- Intended crop type
All these factors can help you decide what will work best for you.
Soil Should Be Balanced
If you choose to grow your microgreens in soil, you need to be sure that your soil is well-balanced and nutrient rich. Nutrients can be added to regular potting soil via fertilizer or compost.
The soil should be light and well-draining while containing enough organic material to retain some water. Your soil should not be soggy, or it will cause root rot. Neither should it be dry. This will cause slow growth or no growth at all.
Soil should be placed three-quarters of an inch deep in your growing tray and spread evenly over the tray.
Before planting your greens, the soil should be kept damp for a day or two. This will prevent the need for watering from above after the seeds are planted.
Watering from above can dislodge the seeds and float them to other areas, resulting in congestion of those areas. Overpopulation will decrease the quality of growth in your greens.
Another watering solution is placing your growth tray inside another solid tray deep enough to allow water to stand between them. The soil in the growth tray can access the water from below as it is needed.
Soil-less Mediums Are Popular Choices
Soil-less mediums can be organic or inorganic compounds that can provide nutrients and support to plant life.
These mediums include:
- Peat moss
- Perlite
- Vermiculite
- Sand
- Coconut coir
A soil-less growth medium performs the growing functions of soil without the problems that are often associated with soil. Soil often encourages bacterial and fungal growth as much as it does plant growth.
Soil-less mediums contain no bacterium or fungi, so the threat to plant life is substantially lowered when grown in these mediums. Soil-less mediums are usually not as prone to weed-growth and infestation with pests as soil is.
Organic soil-less mediums hold water well enough to provide needed hydration for the plants while simultaneously draining excess water away from plant root. The risk of root rot is lower when using this medium for growing microgreens.
Inorganic mediums do not hold water at all, so they will need to be mixed with organic compounds that will retain water sufficiently to prevent plant dehydration.
Growing Mats Are Customizable
A relatively new trend in microgreen gardening is the use of growing mats. Most often, these mats are made of hemp. They are super-convenient and mess-free.
You can buy hemp mats by the roll and cut it to the size you want.
This way, you save yourself hours of labor, and a fair number of dollars by growing microgreens on mats instead of soil.
Before adding seed, the mat needs to be soaked in water for an hour or two. This will give the seeds the maximum advantage when they are planted. After harvesting your microgreens, mats can be re-used.
This takes a little work, but you can cut your costs by re-using a mat for a second crop. To remove remnants of the preceding crop, dry mat out completely. Then toss in clothes dryer on high for a few minutes to shake loose all the roots.
Sanitize and allow to dry.
Alternatively, you can pressure wash mats on low pressure to remove debris, then sanitize and dry.
If re-using seems like too much trouble, you can always recycle by adding old hemp mats to your compost pile.
Hydroponic Mediums Are Great for Small Spaces
Hydroponic crops grow without any type of soil or compost. Usually, there is some type of substrate for the roots to hold onto, but not always.
The plants grow from the nutrients and oxygen delivered to them by water. This makes it necessary to add nutrients to the water, but it also means you can customize your nutrient mix based on the crop you are growing.
Hydroponic crops use much less water than soil-based crops because the water can be recycled.
The water does have to be a proper pH for growing crops. The perfect pH for microgreens is 5.5-6.5. For this reason, the use of tap water is discouraged.
Most tap water is more acidic than microgreens can tolerate. Plus, it is usually highly chlorinated.
If it must be used, it should be boiled or allowed to sit out at room temperature for at least 24 hours to lose most of its chlorine content. Ideally, it should be filtered before use.
The acidity can be lowered by a mix of oyster shell and coral.
Preferably distilled water or rainwater should be used in your hydroponic garden.
There is no mess associated with hydroponic crops, and they are excellent for growing indoors. Some microgreens seem to do best in hydroponic environments; kale especially, loves hydroponics.
The Seed Needs Soaking
Now it’s time to plant. Most growers look for specialized microgreen seeds because they have been prepared specifically for this purpose. Microgreen seeds have been packaged without the use of chemicals to preserve them.
But you can use regular seeds to grow microgreens, too. Just be sure to rinse them well to remove any chemicals that may still be on them.
Remember, chemicals on the seed translates into chemicals in your crop since microgreens are harvested so early.
Soaking some seeds before planting seems to help them germinate more quickly. Not all seeds will need this; check your seed package instructions.
The seeds that do need to soak will need no more than 48 hours in water before planting.
Microgreen seeds do not need to be planted in the traditional sense, where they are dropped in a shallow hole and covered with dirt. Just spread the seeds evenly over your growth medium.
If you are using soil, lightly press the seed against the soil (not into it) so that it has a good contact with its growth medium.
Since the medium has been soaked and the seed has been soaked, there’s no need for watering at this time.
Light Is Not Needed Until Seeds Have Sprouted
For the germination phase of growing microgreens, light is not necessary. The seeds will germinate best in darkness. This can be achieved by simply placing an empty growing tray upside down on top of the tray that contains the seeds.
Your microgreen seeds should be left in total darkness for several days, but don’t forget to water them at least twice a day. This can be done with a mister spray bottle.
Once you see sprouts start to emerge, you can start removing the cover tray for a few hours each day. If you want taller microgreens, leave them covered longer. In darkness, they grow taller. When exposed to light their upward growth slows down and they start to mature.
If your microgreens are outside or in a room that gets direct sunlight, you probably won’t have to make any special provisions for them. But if they are in a place that doesn’t get much sun, you’ll need to provide some sort of artificial lighting for them.
This is most often done with either LED lights or fluorescent lights. Halogen lights and heat lamps are not the best idea unless you live in a cold climate, or you can keep the lights far enough above your plants that they don’t become overheated.
For LEDs and fluorescents, your lights need to be at least one foot above the plants.
Light needs for microgreens vary depending on the type of seed. Some microgreens need only four to six hours of sunlight every day. Others, like sunflowers prefer up to twelve hours of natural light per day.
If you are using artificial lighting, your microgreens’ needs will increase exponentially. Microgreens need from twelve to twenty hours of artificial light every day. In this case, it would be wise to invest in a timer to be certain that your crop is getting the light it needs.
Keep the Air Moving Across Your Greens
Without good ventilation, your microgreen crop can suffer from mold. The warm, moist environment encourages the growth of these microbes, which can kill your crop.
If your microgreens are growing outside, this may not be too much of a problem. The natural breeze will keep the soil dry enough to discourage mold development.
But indoor microgreen crops will need some type of artificial ventilation system.
This doesn’t have to be elaborate or expensive. It can be as simple as a small electric fan placed near each row of seedlings.
Harvesting Your Crop Requires Care
Typically, microgreens are ready to be harvested at about two to four weeks after sprouting.
For best results, microgreens are usually harvested by cutting with scissors just above the root line. This prevents damage to the plant and reduces the presence of dirt on the harvested greens.
Microgreens must be washed before consumption, washing seems to shorten shelf-life. So, limiting dirt accumulation on the greens will reduce the need for repeated washings. This will keep them fresh for longer.
Why Would You Grow Microgreens?
Microgreens are considered a health superfood. They contain many times the vitamins and minerals of their mature counterparts. The exact nutrients will vary with each type of plant.
Full of antioxidants, microgreens are believed to help in preventing some diseases since antioxidants rid the body of free radicals.
They are thought to help control health issues such as diabetes by replacing the nutrients depleted by endocrine-disrupting chemicals found in commercial foods.
Microgreens are used in a wide variety of ways. These colorful herbs and vegetables are:
- Eaten raw in salads or sandwiches
- Added to smoothies
- Used as garnishes
Some people even grow them commercially and sell them to restaurants or at farmer’s markets in their areas.
Growing microgreens is probably one of the easiest gardening projects you will ever undertake. Since the time from planting to harvest is so short, they don’t require an enormous time commitment.
Growing microgreens take up considerably less space than growing vegetables to maturity.
This makes them an excellent choice for city-dwellers who have little space available. They can still enjoy fresh produce without needing a huge greenhouse or garden.
When placed in a controlled environment, microgreens can be grown year-round. This means fresh garden greens whenever you want them regardless of the season.
There is even talk of using microgreens to sustain astronauts on long-duration missions when such becomes possible. Given the adaptability of microgreens to different growth mediums, this may be completely doable.
What Is A Microgreen?
Microgreens are herbs and vegetables that we have consumed for years. The only difference is that microgreens are not allowed to fully mature.
Microgreens are older than sprouts but younger than baby greens. They are harvested just after the first leaf opens.
This means that they are quite small and very tender, as suggested by the name. This makes them perfect for raw consumption. They are a welcome addition to any vegan or vegetarian diet.
The high nutritional content makes up for the rather restrictive nature of the diet.
Herbs and vegetables grown as microgreens include:
- Kale
- Mustard
- Broccoli
- Beet
- Basil
- Cilantro
- Peas
- Radishes
- Cabbage
- Lettuce
- Dill
- Cucumber
- Spinach
- Squash
- Onion
- Garlic
- Carrots
Edible flowers such as sunflower are also grown as microgreens. In addition to their vitamin content, all these plants add color and texture to one’s diet.
Taste depends on the crop grown and the amount of light to which it is exposed. Some crops like corn are sweeter when grown in total darkness. The reason for this is that photosynthesis can make the shoot fibrous and bitter.
If photosynthesis is retarded by keeping the shoots in the dark, the end result will be a sweet microgreen.
The tastes of microgreens range from bitter to sweet and all flavors in between. Most taste, much like their parent plant but have an aftertaste that is different.
Microgreens are famous for combining flavors in the same plant, such as sweet and spicy.
Not All Vegetables Can Be Microgreens
While most vegetables can be grown as microgreens, this is not the case for all. Root crops of the nightshade family are poisonous in their seedling state.
The alkaloids in the sprouts of these plants cause aberrations in the human nervous system.
Nightshade plants include:
- Potatoes
- Tomatoes
- Eggplants
- Peppers
These plants must grow to maturity before they are safe for human consumption.
The Best Microgreen Is the One That Gets Eaten
With all the options available, it can be overwhelming to decide which crop you should grow. Admittedly, some microgreen crops are harder to grow than others. A beginner should try the easiest crops first.
But ease of growth should not be the only consideration when choosing your crop. Microgreens are grown to be eaten.
Unless you are planning to sell your microgreens to local restaurants or grocers, it is best to plant the crop that you will eat.
Microgreens have a very short shelf life as it is, so you don’t want to put your time and energy into a crop that will spoil because it’s something you don’t like.
It might be easier to decide your microgreen crop by looking at which fully mature vegetables you like.
Now, of course, there’s no guarantee that your microgreens will taste exactly like your favorite vegetables. You are, after all, eating seedlings and not produce. But this may be a general help in figuring out which crops you’ll come closer to eating.
You also need to look at how much you will likely consume so that you don’t plant too much and waste a good portion of your crop.
Once you have a little experience, you can try growing multiple crops at once for variety of color and flavors.
Don’t Overstock on Seed
It can be confusing at first to know how much seed you need. Microgreen crops usually don’t produce a second growth after the first is harvested. So, you’ll need to start all over after every harvest.
The amount of seed needed to keep you supplied with fresh microgreens depends on several factors:
- How big a crop you plant
- How many times you plant
- How many varieties you plant
- Whether or not you sell your greens
In general, you should not have more than a year’s worth of seed on hand at any given time. Surplus seed should be stored in a cool place away from light and moisture.
Take the Guesswork Out with Microgreen Kits
You can skip all the research and just get started already with the microgreen kits that are available now. These are done for you kits that range from the complete starter kits to variety seed packs.
Like this indoor starter kit. It comes complete with:
- Seeds
- Soil pucks
- Wooden grow box
- Burlap waterproof grow bags
This kit is truly organic in every sense of the word. It features four rare types of non-GMO vegetable seeds that can be grown indoors or outdoors. All you have to do is follow the instructions and enjoy your crop. Plus, the grow box can double as a gift box.
Build Your Own Variety Or buy It Pre-Packaged
If you know what you like, you can buy your seeds for your microgreen garden. This way, you’re sure to grow only what you enjoy.
The only downside to this is that not all plants require the same nutrients. So, you may find yourself needing to do a lot of extra calculations and nutrient mixing to be sure each one gets what they need.
Or you can buy the variety packs already put together. Most of these packs are carefully selected so that all the different seeds require roughly the same nutrients.
Grow Your Health With Microgreens
Growing your microgreens without the use of plastics ensures highly nutritious food for you. Your health will thank you.